
In this Article: If you want to access files stored on your desktop from your laptop (or vice versa), you can set up file sharing between the two computers to make file transfers easier. This article will show you how to connect any Windows or macOS laptop to a Windows or macOS desktop computer—even cross-platform!
Method 1
Connect two Windows computers via an Ethernet cable

1. Connect the two computers with an Ethernet cable.
Plug one end of the Ethernet cable into the square port on the back of the desktop computer, then plug the other end of the cable into the corresponding port on the side of the laptop.

2. Open the Control Panel on the first computer.
You can type Control Panel into the search bar next to the Windows menu, and click Control Panel in the search results.

3. Click Network and Internet.
It should be on the left side of the Control Panel page.
If you have “Small icons” or “Large icons” in the upper right corner of the Control Panel page, you can skip this step.
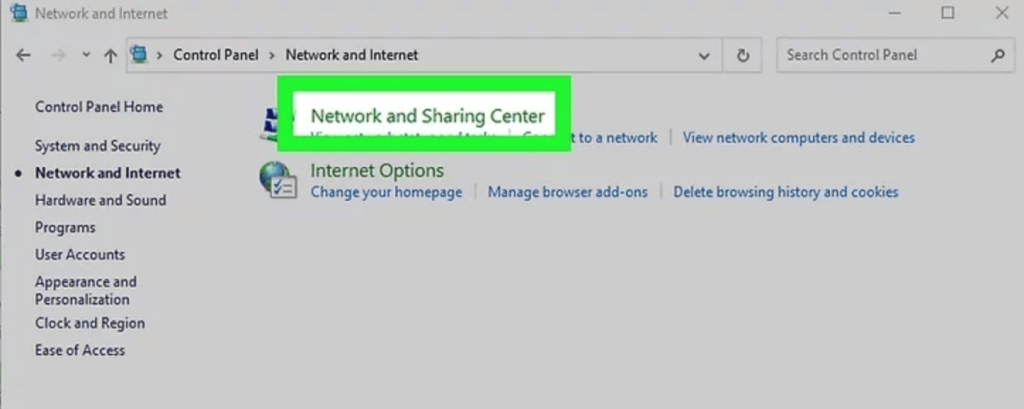
4. Click Network and Sharing Center.
This will open a list of all current connections, including your Ethernet connection to your laptop.
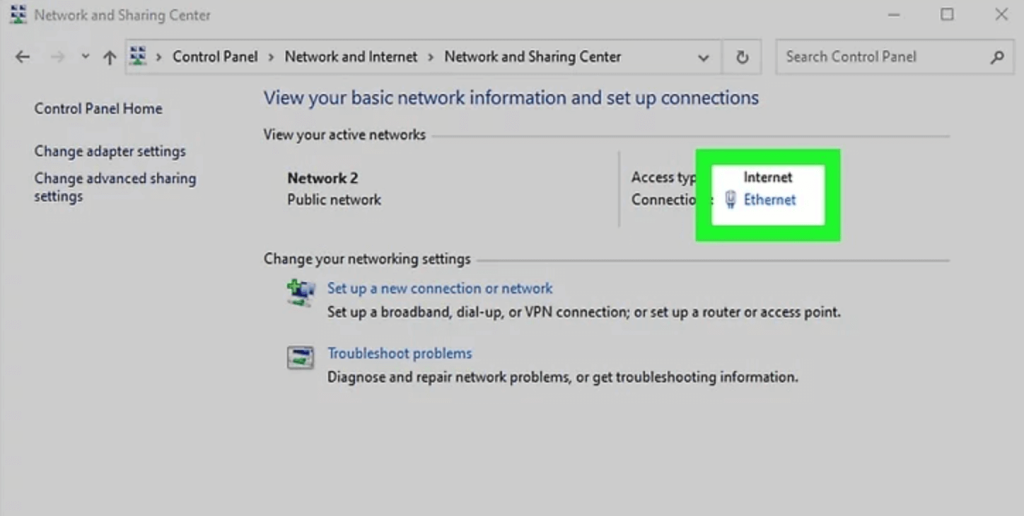
5. Click Ethernet.
It’s a link to the right of the “Unidentified Network” connection in the right panel.
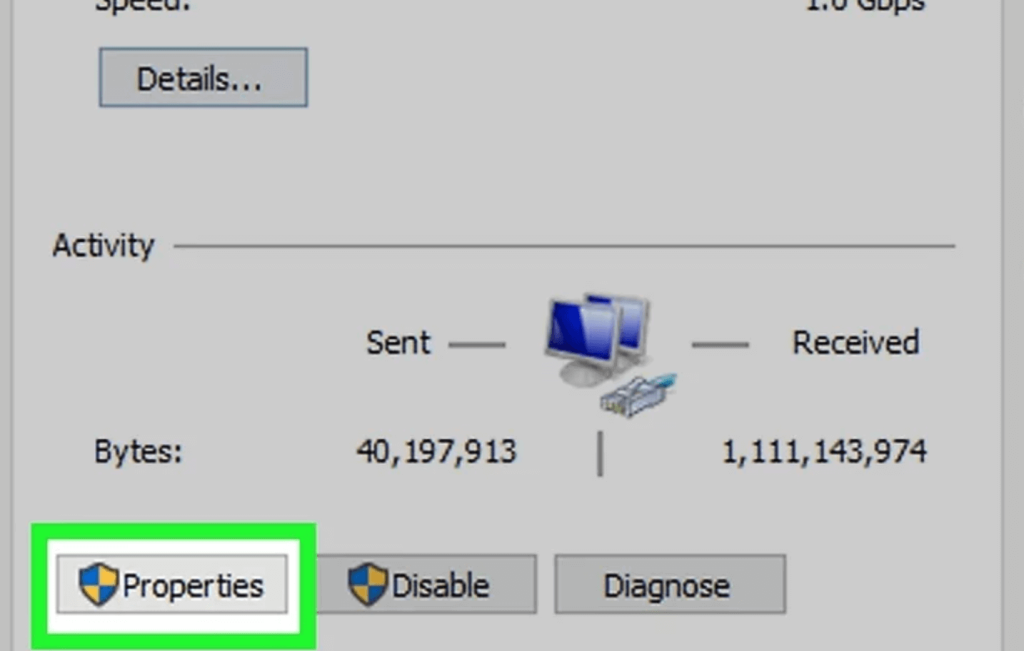
6. Click the Properties button.
It’s in the lower-left corner of the window.
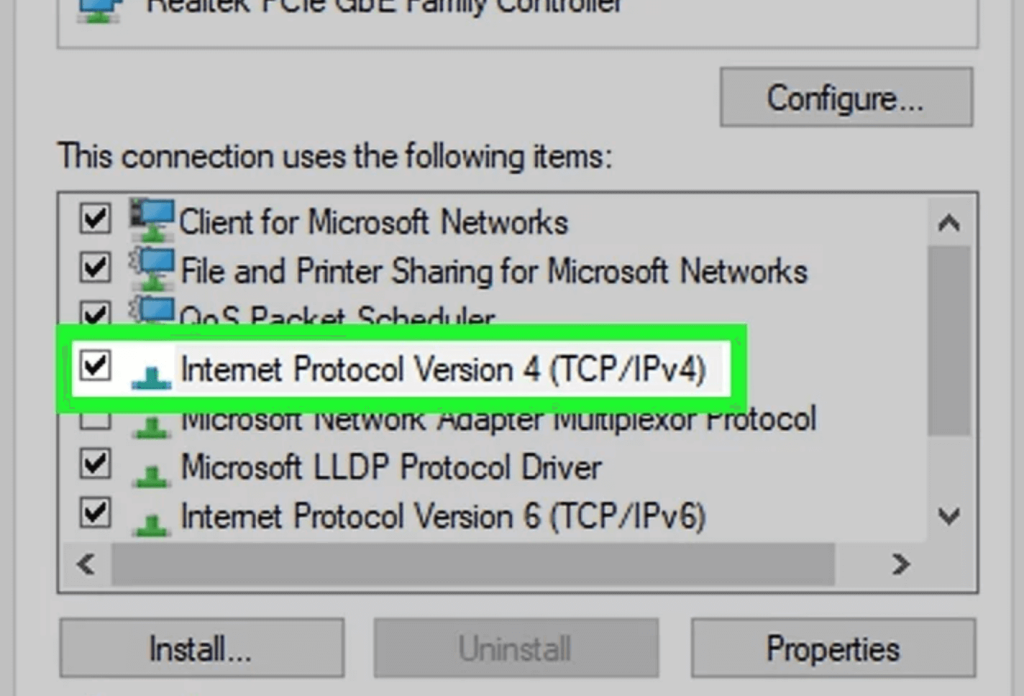
7. Click Internet Protocol Version 4.
You’ll find this line of text in the middle of the window. Click to select it.
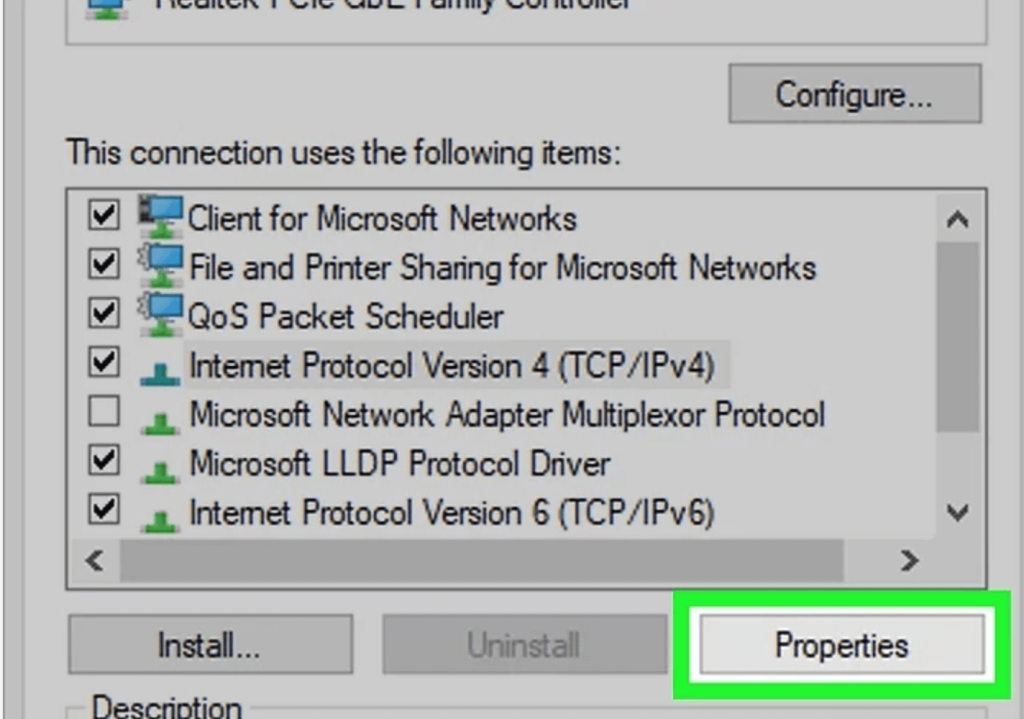
8. Click Properties.
It’s at the bottom right of the window.

9. Change the IP address of the connection.
Check the “Use the following IP address” box near the top of the page, then complete the following fields:
IP address – enter 192.168.1.1
Subnet Mask – Enter 255.255.255.0

10. Change the IP address on the laptop. Do the following:
Go to the “Network and Sharing Center” in the same way as on the desktop.
Open Ethernet Properties, select Internet Protocol Version 4, and click Properties.
Check the “Use the following IP address” box at the top of the page.
Enter 192.168.1.2 in the IP Address field.
Enter 255.255.255.0 in the Subnet Mask field.
Click OK twice.

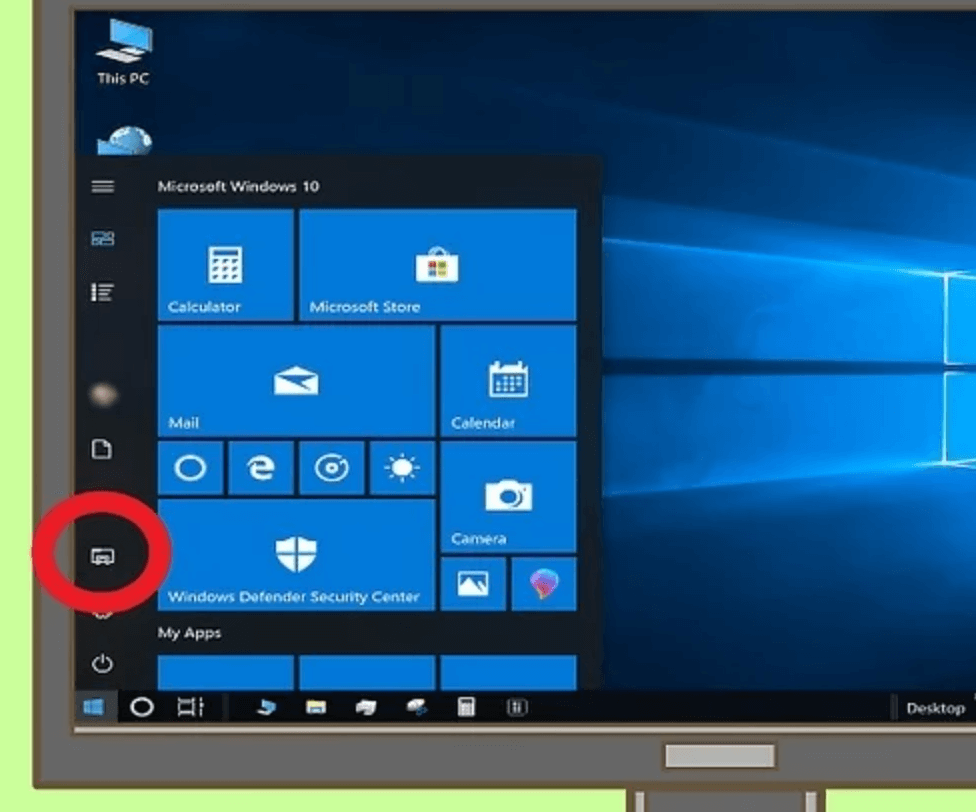
11. Open File Explorer on any computer.
Click the folder icon in the taskbar, or click File Explorer in the Windows menu to open it.
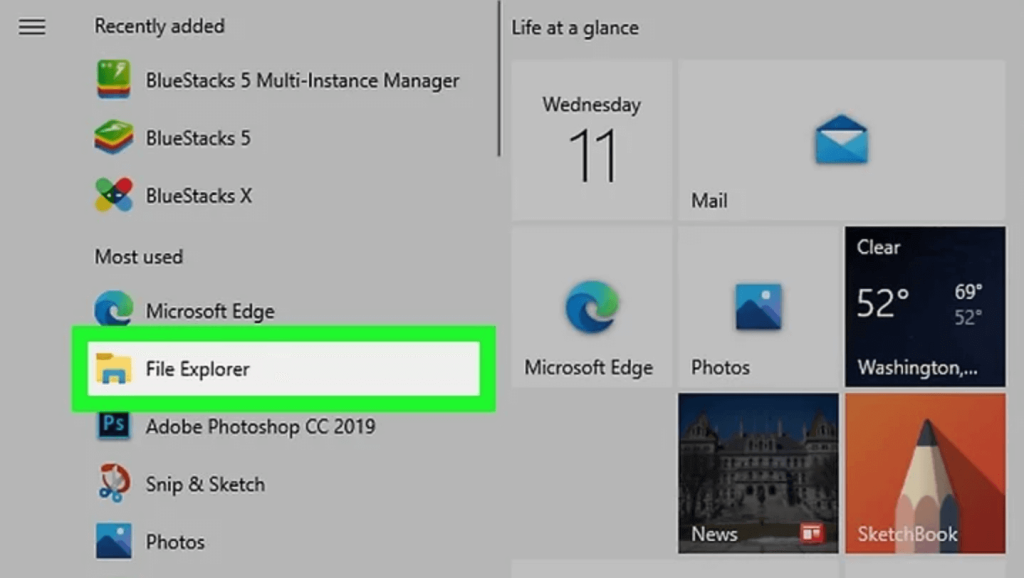
12. Open File Explorer.
Click the folder icon at the bottom left of the Start window.

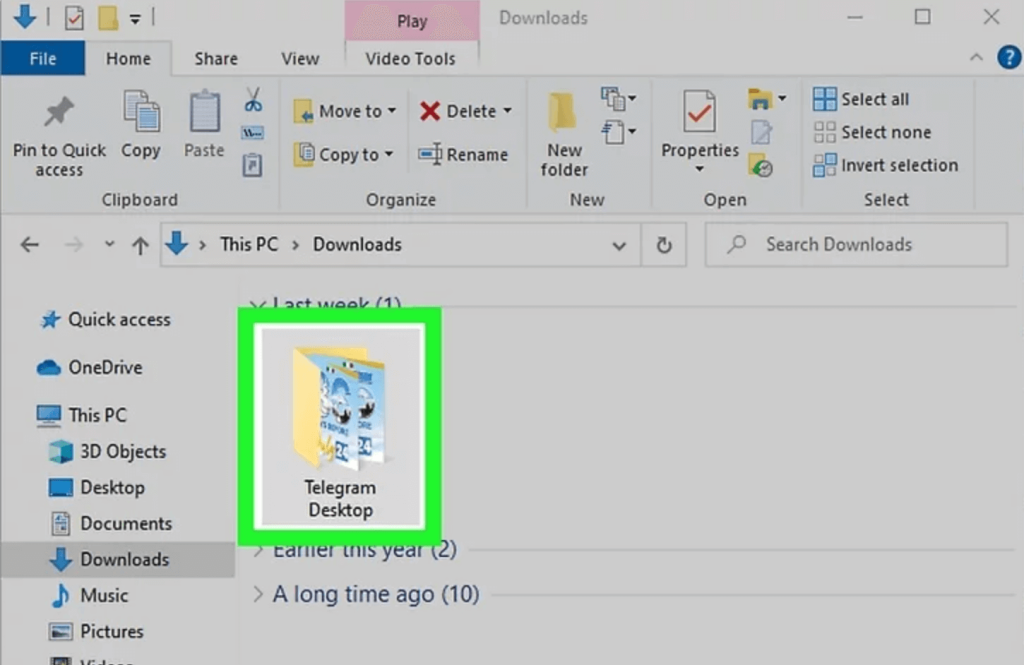
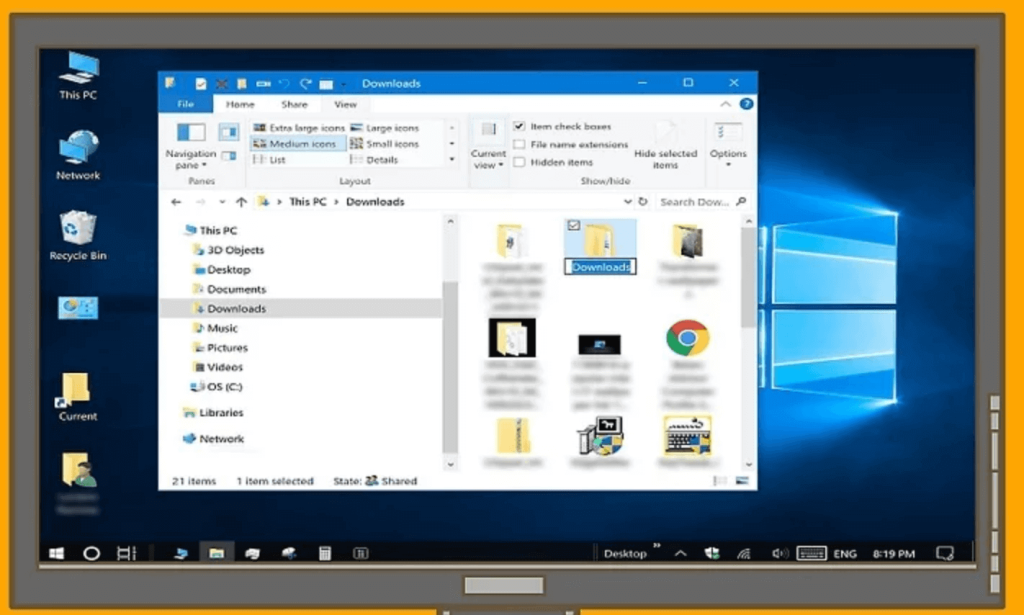
13. Select a shared folder.
Click on the folder you want to share from your desktop to your laptop.
You can also create a new folder to share.

14. shared folders. Do the following:
Click Share in the upper left corner of the window.
Click Specific User….
Click the drop-down arrow.
Click on everyone.
Click Share.
Tap Done when prompted.

15. Put the files to share in the folder. Do the following:
Find the file you want to share.
Select a document.
Press Ctrl+C to copy the file.
Open the shared folder.
Press Ctrl+V to paste the file.

16. Switch to another computer.
Go back to your Windows laptop or desktop where you want to access the shared folder.
17. Open the shared folder.
Open Start, click File Explorer, click the desktop computer name in the lower-left corner of the File Explorer window, and then double-click the folder.
You may have to scroll down the leftmost folder bar to see the name of the desktop computer.

18. Move the shared files to the laptop.
Select the file, press Ctrl+C, open the folder where you want to save the file, and press Ctrl+V.
You can also add files from your laptop to a shared folder if you want to access them on your desktop computer.
Method 2
Connect Two Windows Computers Wirelessly

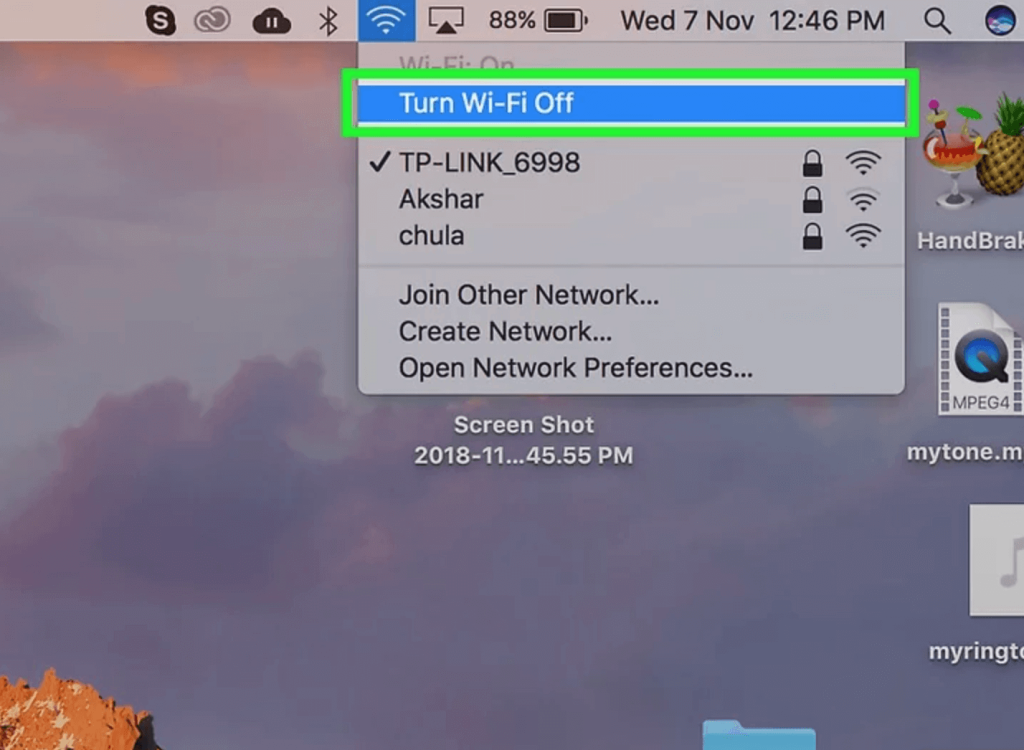
1. Connect your Windows desktop and laptop to the same Wi-Fi network.
As long as both computers are connected to the same Wi-Fi network, accessing another computer’s shared files is simple.
You can also use this method if both computers are connected to the same network via Ethernet cables, such as via a router or switch.
The steps are similar in Windows 10 or Windows 11.

2. Open “File Explorer” on the computer where the file to be shared is located.
If you want to make the folder accessible from both sides, you can open it on both desktop and laptop.
File Explorer is a folder icon on the taskbar or in the Windows menu.

3. Right-click the folder to be shared and select Properties.
A dialog window will expand. [1]
You can also share individual files instead of folders if you prefer.

4. Tap the Share tab. It’s at the top of the window.
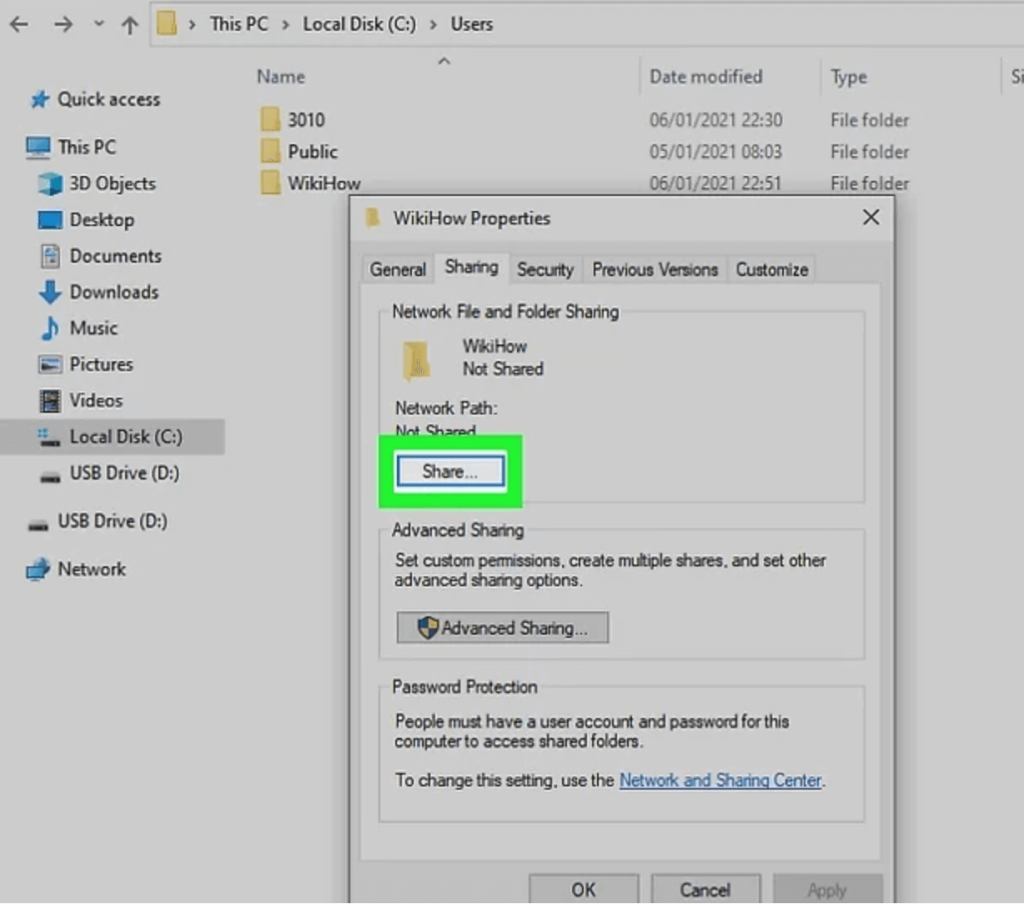
5. Click the Share… button.
This will open a window allowing you to share the folder with others.

6. Select the user you want to share with.
Clicking on the menu will bring up a list of accounts, then select the account you want to share with it. Click Add to add the user.
By default, a file or folder is automatically shared with the owner’s account. If you log into your laptop and desktop with the same account, you don’t need to add any other accounts.

7. Select the permissions for the shared content.
If shared with another account, read permissions are assigned by default. If you want to grant full access to the account, click the drop-down menu next to “Read” and select Read/Write.
If you are the owner of the file and plan to log in with the same account on both computers, there is no need to adjust the permissions—you already have full permissions.

8. Click the share button.
This will share the file with the selected users.
If network discovery and file sharing are not turned on, the system will remind you to enable these services now. You can select No if you’re currently on a private network, such as at home, or select Yes if you want to enable file sharing on public networks, such as coffee shops and college campuses.

9. Open “File Explorer” on another computer.
Now that the folder or file is shared on one computer, you can access it from another computer.
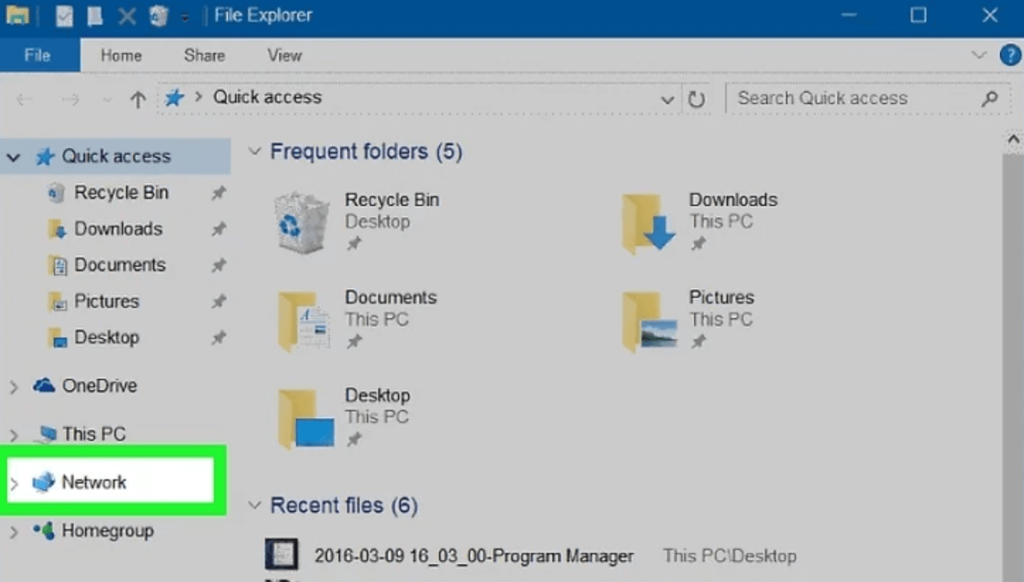
10. Click Network in the left pane.
This will display the computers on the network that share files.
If you haven’t already turned on network discovery and file-sharing services on this computer, you need to turn them on now. Click the yellow bar at the top of the window and select No if you’re currently on a private network, or Yes if you want to enable file sharing on a public network.

11. Double-click the name of the computer where the file is shared.
You will be prompted to log in.

12. Login with an account that has permission to access shared files. Once logged in, you can access shared files in the selected folder.
Method 3
Connect Two Macs Wirelessly
1. Connect the laptop and desktop to the same Wi-Fi or LAN network.
If your MacBook and Mac desktop are both connected to the same network—whether wireless or wired through a router or switch—it’s easy to set up file sharing between them.

2. Open System Preferences on the Mac where you want to share the file.
For example, if you want to access folders located on your desktop while using your MacBook, open System Preferences on your Mac’s desktop.
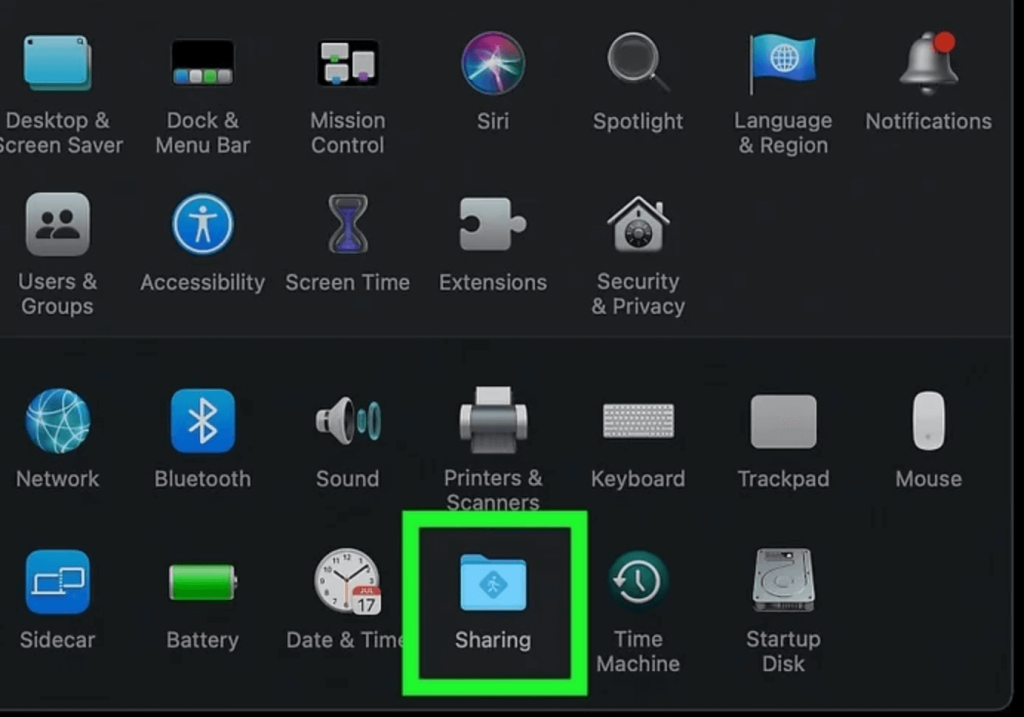
3. Tap the share icon.
It’s a blue folder with a plus sign. [2]
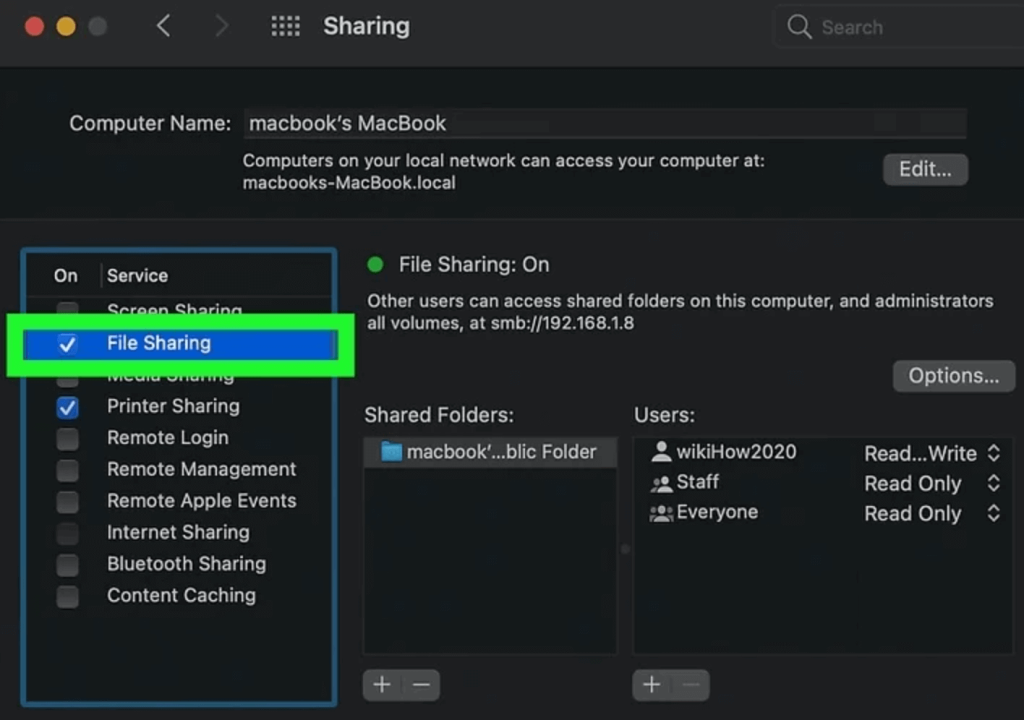
4. Check the box next to “File Sharing”.
You’ll see this option in the list of services on the left panel. This will turn on file sharing.

5. Add folders to share.
To do this, just click the + under “Shared Folders” in the right panel, find the folder, select it, and click Add.
Repeat the above steps for any other folders you want to share.

6. Choose who can access the shared content.
Choose the folder you want to share, and then in the Users section, choose an account to share it with. You can also click + to share content with accounts not listed here.
You can choose Everyone to make the files accessible to anyone connected to the network, or you can choose a user group to make the files accessible to everyone in the group.

7. Select the permissions to assign.
Next to each user, you can choose which permissions to assign to them – for example, if you want a user to have full access to a folder when they log in from a desktop or laptop, assign all permissions (read and write). [3]
The folder or file is now shared.

8. Connect from the Finder on another Mac.
Now that you’ve shared a folder or file on one Mac, you can open the Finder on the other Mac to access the shared file. Open the Finder, then:
Click Networks under “Locations” in the left panel. After a few moments, you should see the name of the other Mac in the list.
Double-click the name of the other Mac.
Click Connect as in the upper right corner.
Log into the other Mac with any valid account.
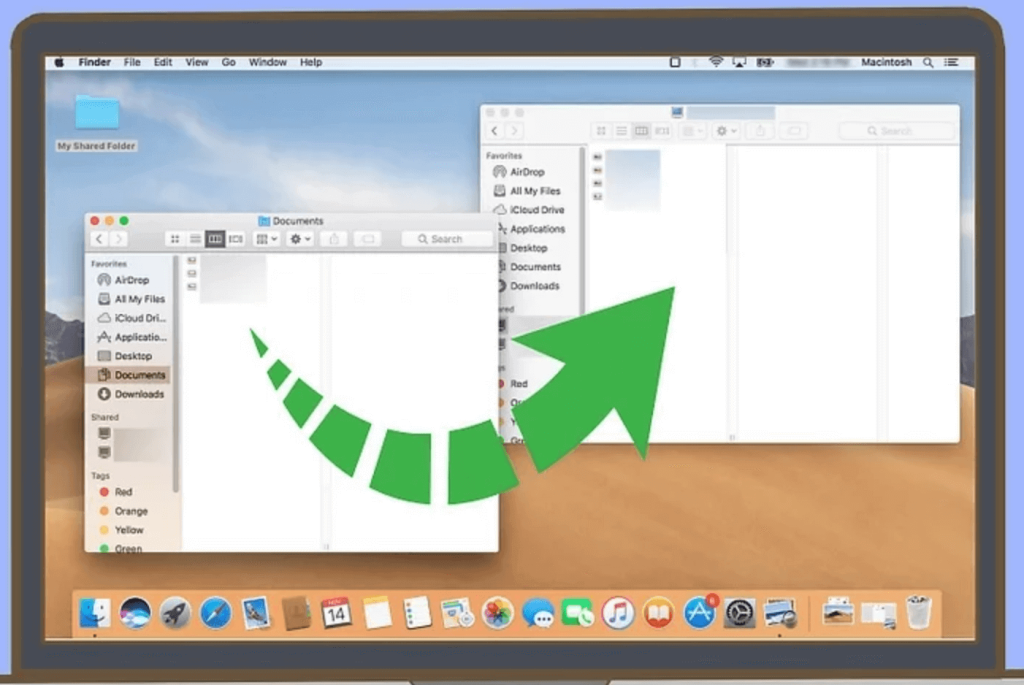
You can now drag and drop files between your desktop and laptop.
Method 4
Connect two Mac computers via Thunderbolt 3 or 4 cables

1. Check if you have a Thunderbolt 3 or Thunderbolt 4 port on your Mac computer.
Most recent Macs from 2016 and later have this type of port. Find the oval port on your laptop and on the back of your Mac desktop that has a lightning bolt logo next to it.
Transferring files via Thunderbolt is much faster than via Wi-Fi. [4]
You can also visit https://support.apple.com/en-us/HT201736 to learn which Mac computer models have Thunderbolt 3 and 4 ports.
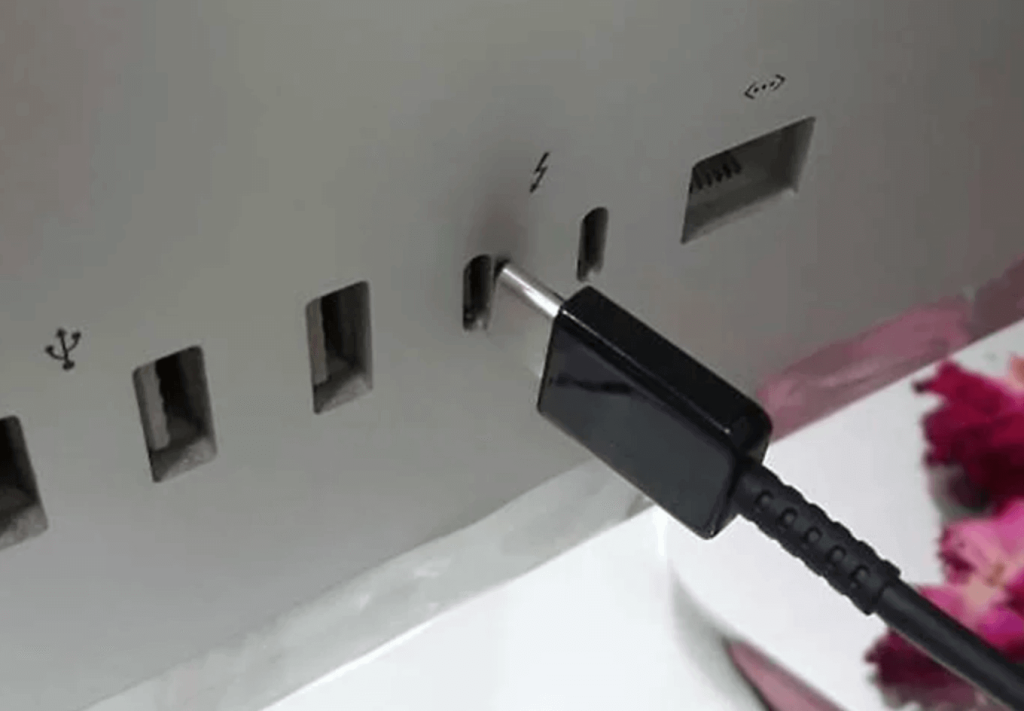
2. Connect two Mac computers with a Thunderbolt 3 or Thunderbolt 4 cable.
You’ll want to make sure you use a cable specifically labeled “Thunderbolt 3” or “Thunderbolt 4” because some other cables have similar connectors.
If your Mac computer comes with Thunderbolt 2 and not Thunderbolt 3 or 4, then you can use the Thunderbolt 2 to Thunderbolt 3 adapter.
3. Open System Preferences on both Mac computers.
You’ll want to complete these remaining steps on both laptop and desktop Mac computers. “System Preferences” is located in the Apple menu in the upper left corner of the screen. [5]

4. Click on the Network icon.
It is a spherical icon.
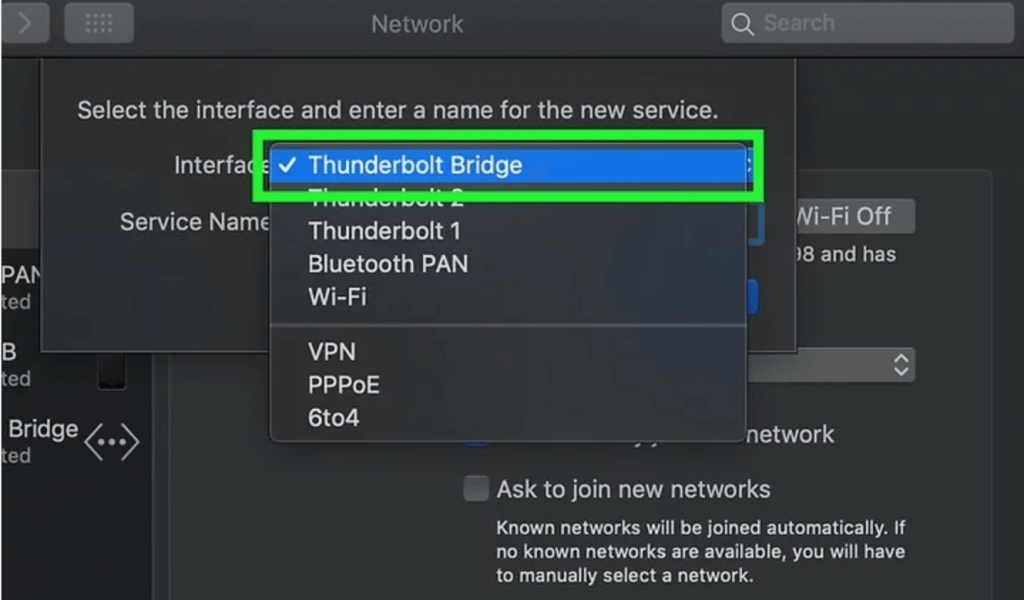
5. Select the Thunderbolt bridge.
You will see this option in the left panel. Once this option is selected on both Macs, the status under “Thunderbolt Bridge” on the left will change to “Self-assigned IP”. Once this is displayed, you can start transferring files from one Mac computer to the other.
If you don’t see this option, click + in the left panel under the list of connections, select Thunderbolt Bridge from the Interface menu, and click Create.

6. Connect to the other Mac computer during the visit.
Now, both Mac computers are connected with Thunderbolt Bridge and you can access your files over the network. Open Access Point on either of the two computers and do the following:
Click Network in the left panel under Location. Wait for a moment and you will see the name of the other Mac computer in the list.
Double-click the name of the other Mac.
Click Connect as in the upper right corner.
Sign in to the other Mac using any valid account.
Now, you can drag and drop files between your desktop and laptop.

Method 5
Connect from Mac computer to Windows computer wirelessly
1. Open File Explorer on your Windows computer.
If you want to access the files stored on your Windows desktop or laptop from your Mac computer, you have to share the files in File Explorer first.
“File Explorer is the folder icon on the taskbar or in the Windows menu.
2. Right-click on the folder you want to share and select Properties.
A dialog window will be opened.
If desired, you can also share individual files instead of folders.

3. Click the Sharing tab.
It is located at the top of the window.

4 Click the Share… button.
This will open a window that allows you to share the folder with others.

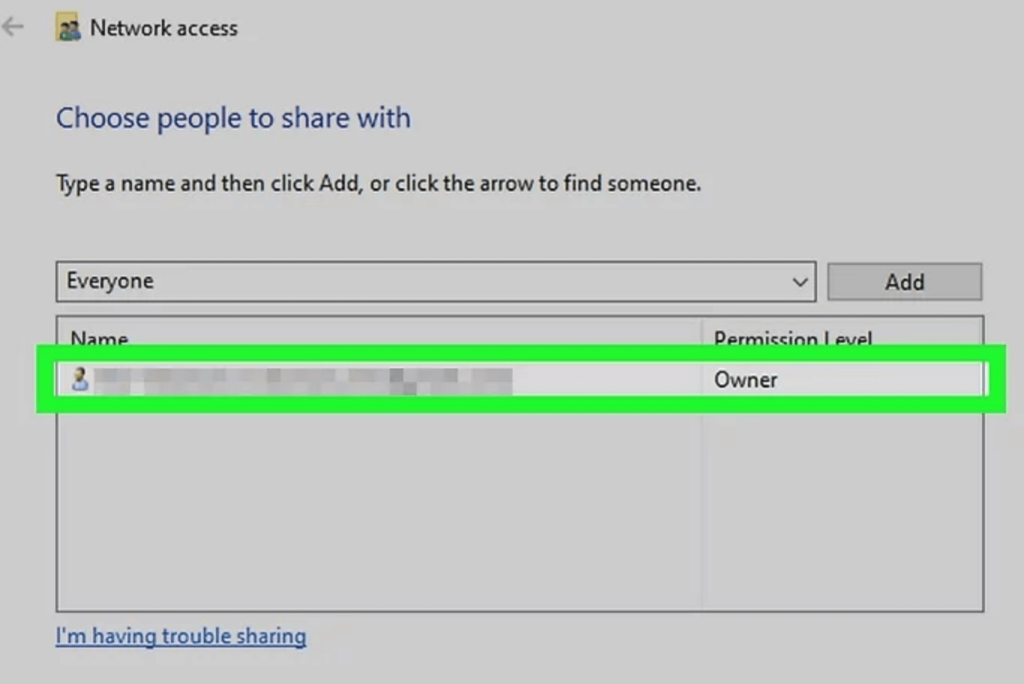
5. Select the user you want to share with.
Clicking on the menu will bring up a list of accounts, then select the account you want to share with it. Click Add to add that user.

6. Select the permissions for the shared content.
If you are sharing with another account, read permissions will be assigned by default. If you want to grant full permissions to the account, then click the drop-down menu next to Read and select Read/Write.
If you are the owner of the file and intend to log in with the same account on both computers, then you do not need to adjust the permissions – you already have all the permissions yourself.
7. Click the Share button.
This will share the file with the selected user.
If network discovery and file sharing are not enabled, then the system will remind you to enable these services now. Choose No if you are currently on a private network, such as at home, or Yes if you want to enable file sharing on a public network (such as in coffee shops and on college campuses).

8. Open Access on a Mac computer
Now that the file is shared on a Windows computer, you can connect to it in Access.

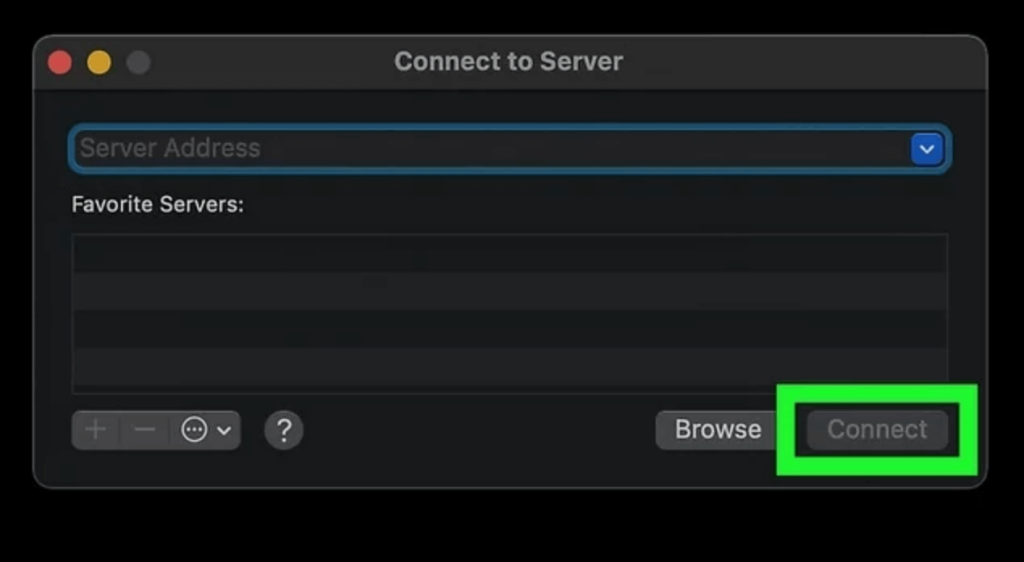
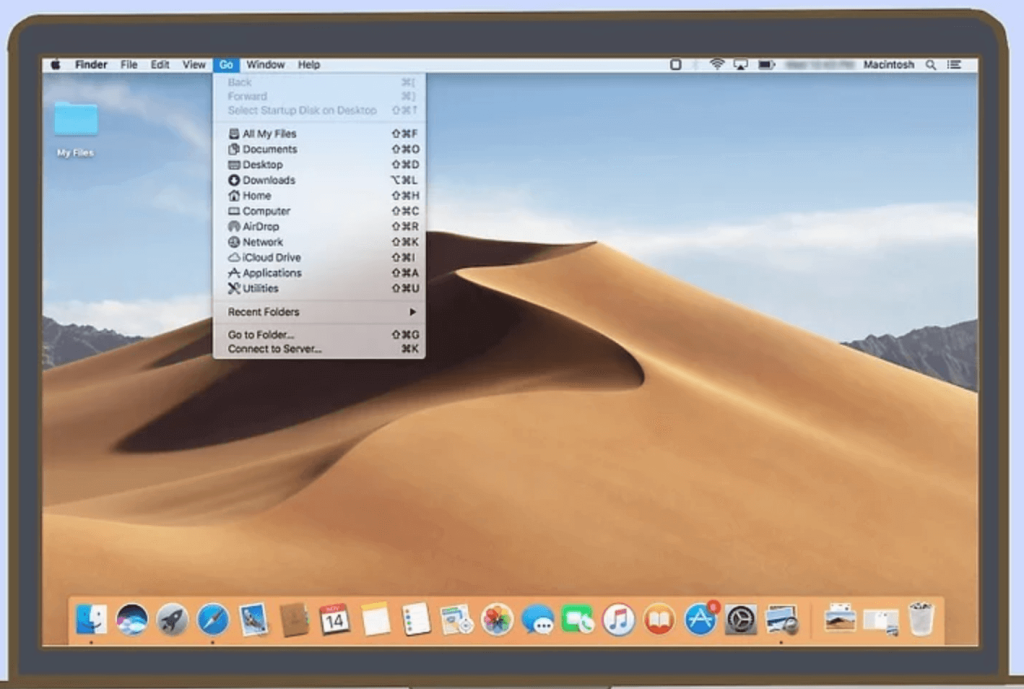
9. Click the Go to the menu and select Connect to Server.
The Go to the menu is located at the top of the screen. [6]
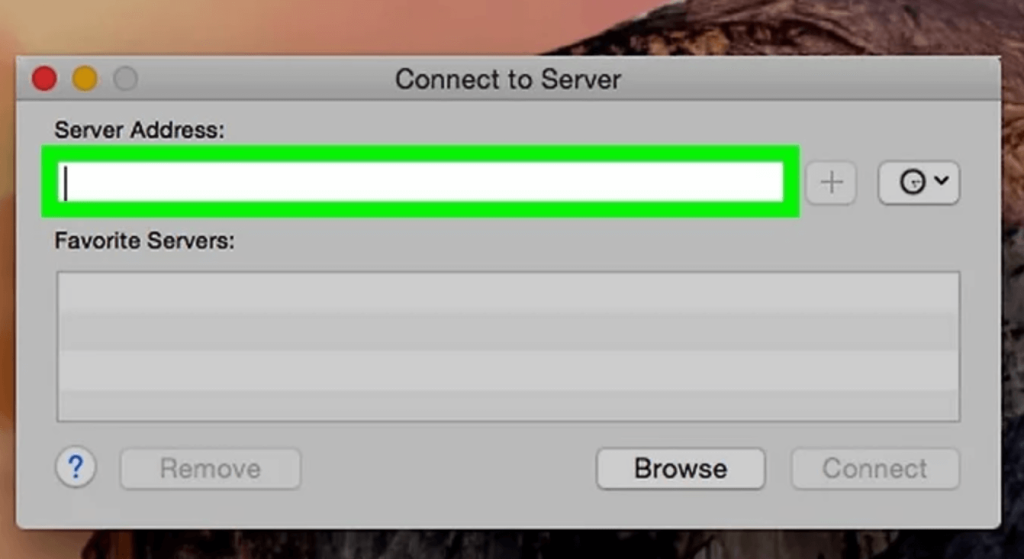
10. Click Browse
This tells the Mac computer to find all networked computers that accept the connection. The Windows computer should appear at this point.

11. Select the Windows computer and click Connect As.
This will expand the Login field. If you do not find this computer, click All so that all shared computers are displayed first.
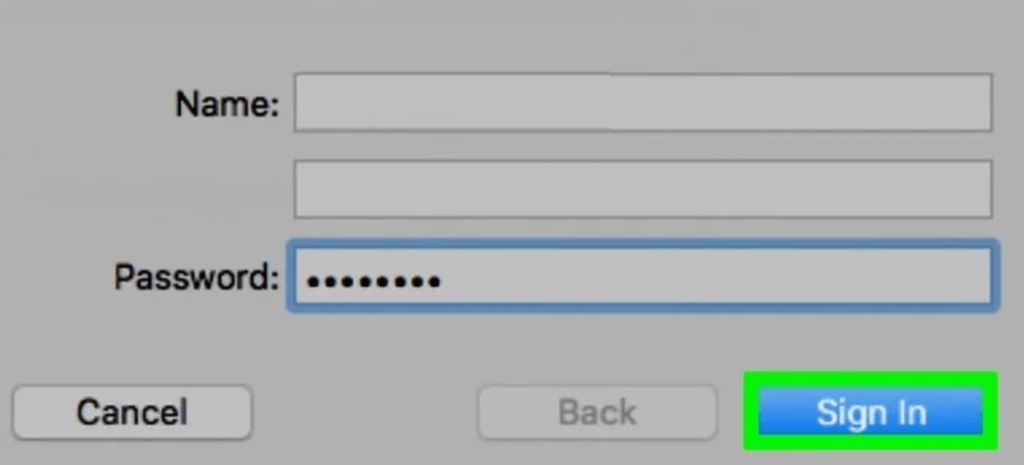
12. If prompted, log in to the computer.
Once logged in, you will be able to browse and drag and drop files between the two computers according to the permissions set.
Method 6
Connect from Windows computer to Mac computer via Ethernet cable
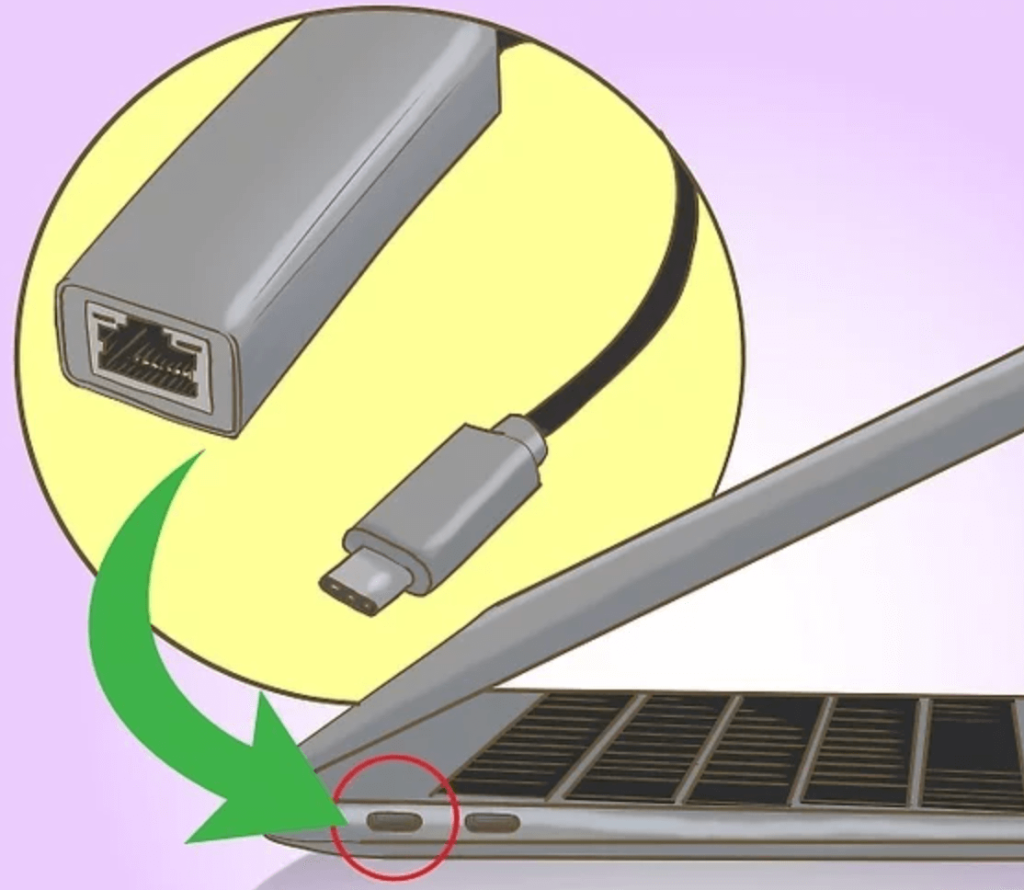
1. Buy a USB-C to Ethernet adapter for your Mac computer.
Mac computers no longer come with an Ethernet port, but you can purchase a USB Ethernet plug-in to connect to a USB port on your Mac computer.

2. Install the adapter on the Mac computer.
Plug the USB computer end of the adapter into one of the USB ports on the Mac computer.
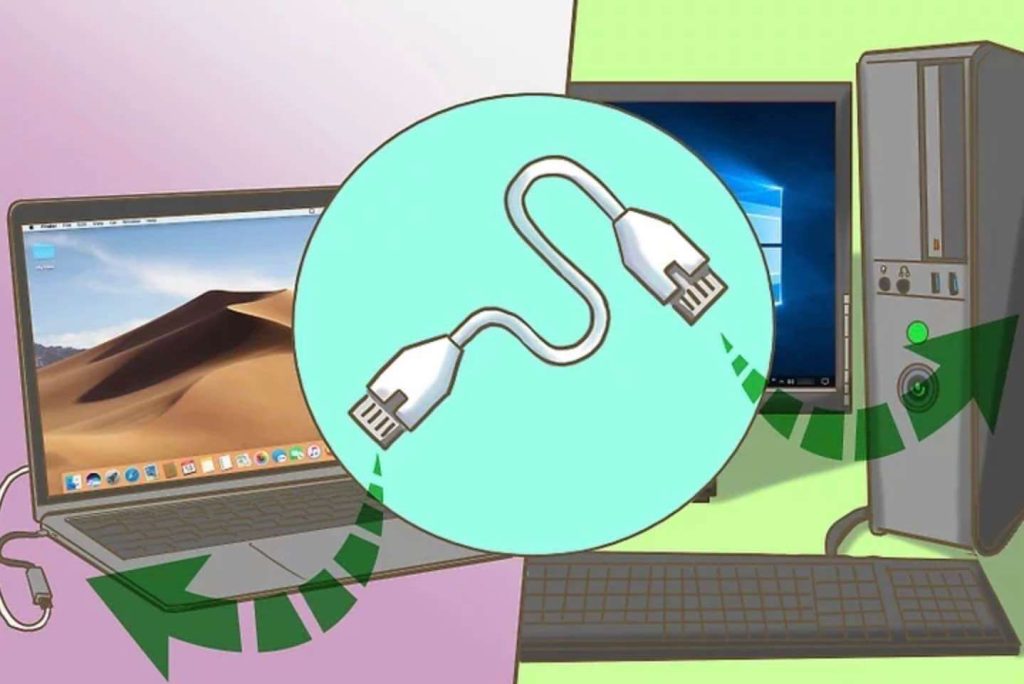
3. Connect the two computers with an Ethernet cable.
Plug both ends of the Ethernet cable into square Ethernet ports on each of the two computers.

4. Open Start.
Click the Windows logo in the lower-left corner of the Windows computer.
5. Open “File Explorer”.
Click the folder icon in the lower-left corner of the Start window.
6. Select a shared folder.
Click a folder that you want to share from your desktop computer to your Mac computer.
You can also create a new folder to share.’

7. Share the folder.
Do the following:
Click Share in the upper-left corner of the window.
Click Specific Users….
Click the drop-down arrow.
Click Everyone.
Click Share.
Click Done when prompted.
8. Switch to Mac computers and click Go.
This menu item should be at the top of the screen.
If you don’t see Go to in the menu bar, then open Access or click Desktop to make it show up.
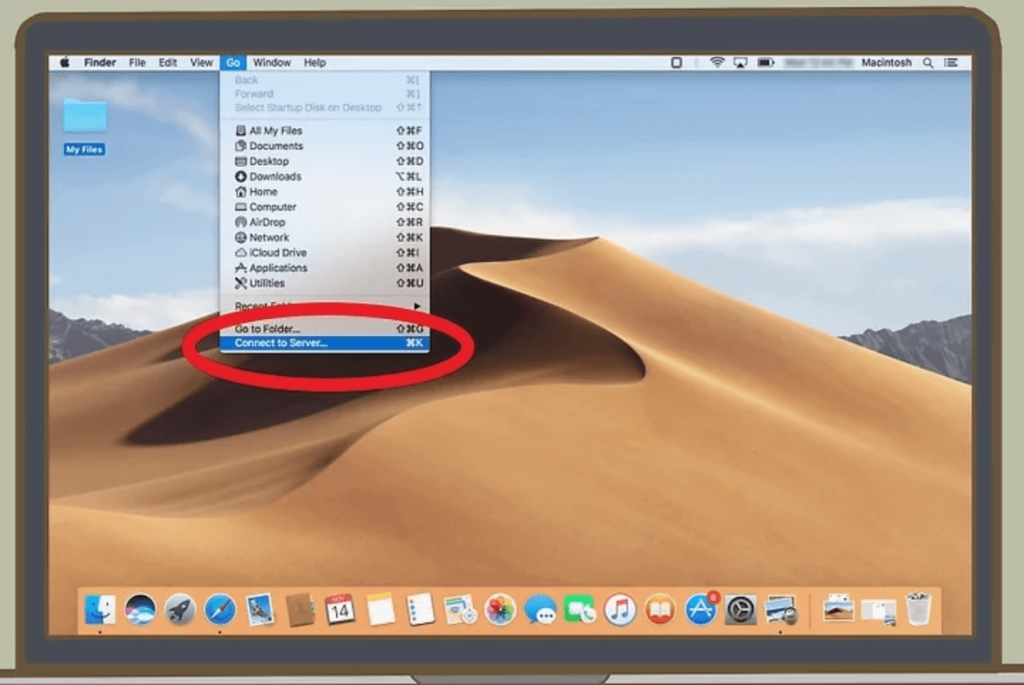
9. Click Connect to Server.
It is near the bottom of the Go to drop-down menu.
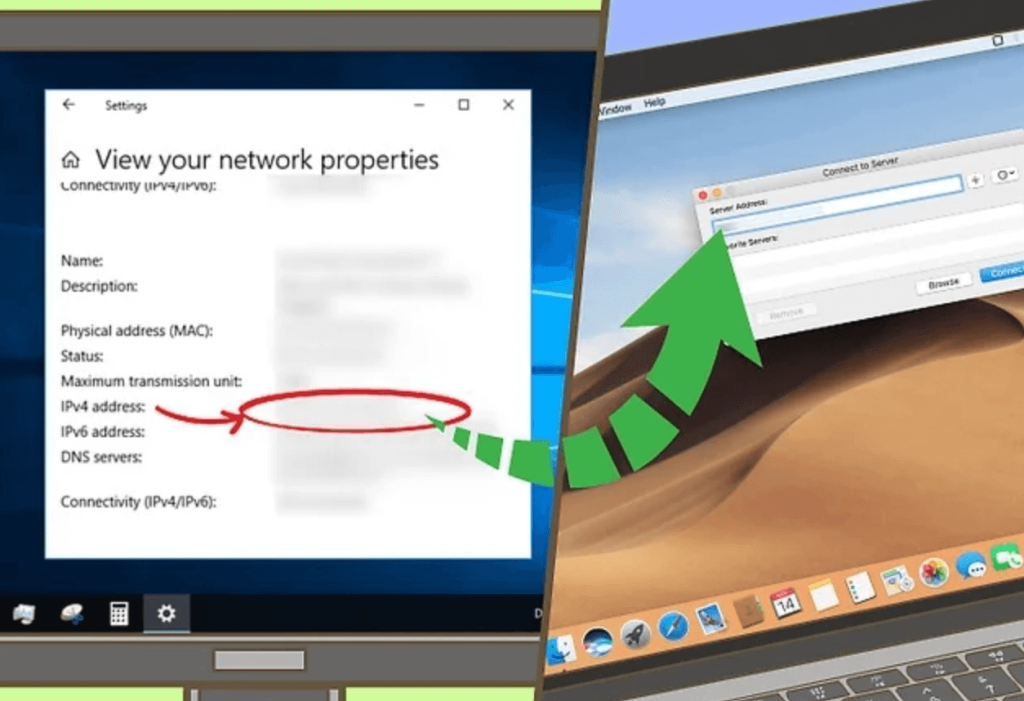
10. Enter the IP address of your Windows computer.
Enter the IP address of your Windows computer in the text field at the top of the window.
To find the IP address of your Windows computer, you can open Start, click Settings
, click Network and Internet, click Status, click View Network Properties, scroll down to the “Name: Wi-Fi” section, and look for the address to the right of the “IPv4 Address” heading.

11. Click Connect.
This will open another window.

12. Enter the information for your Windows computer.
Do the following:
Check the “Registered Users” box.
Enter the account user name of the Windows computer in the “User name” text field.
In the Password text field, enter the account password for the Windows computer.
Click Connect.

13. Place the files in the shared folder.
Go back to the Windows computer and do the following:
Find the file you want to share.
Select the file.
Press Ctrl+C to copy the file.
Open the shared folder.
Press Ctrl+V to paste the files.
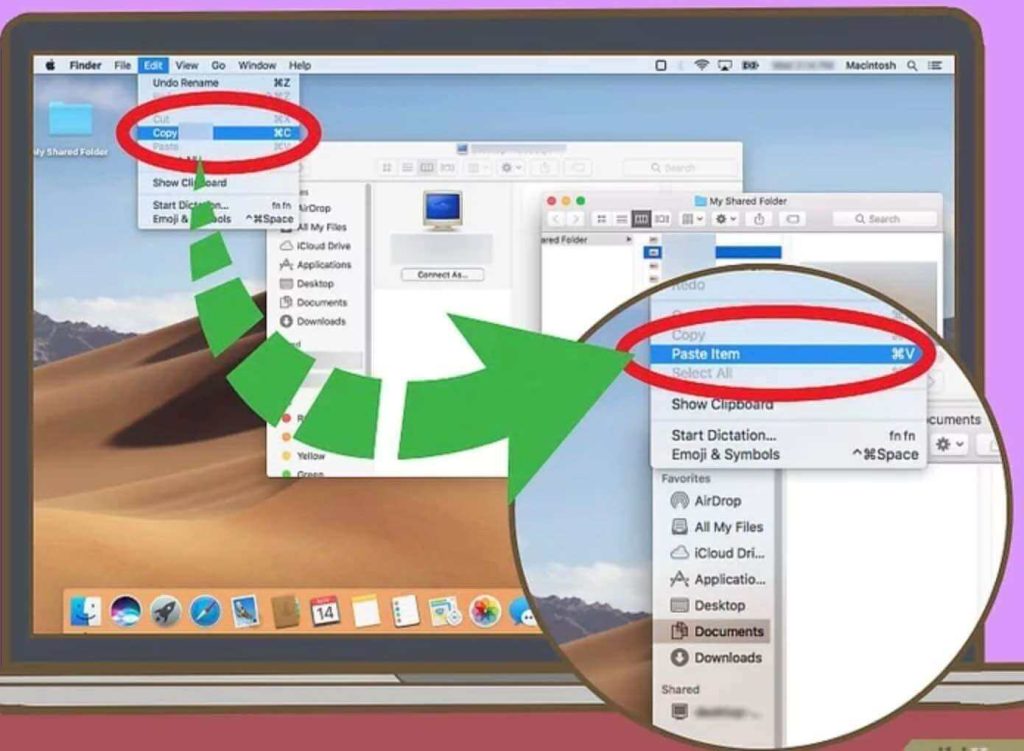
14. Locate the files on your Mac computer.
Go to your laptop and do the following:
Open Access.
Click the name of the Windows computer on the left side of the access point.
Open the Shared folder.
Select the shared file.
Click Edit at the top of the screen, and then click Copy.
Select a folder that you want to use to store the shared files (for example, Desktop).
Click Edit at the top of the screen, and then click Paste Item.
15. Share files from your Mac computer to a Windows computer.
To do this, you simply place the files on your Mac in the shared folder, then open the shared folder on your Windows computer and copy the files directly from it.
Method 7
Connect Mac computers wirelessly to Windows computers

1. Open System Preferences on your Mac computer.
If there are files on your Mac laptop or desktop that you want to access from your Windows computer, then first open System Preferences from the Apple menu.
Both Windows and Mac computers need to be connected to the same Wi-Fi or wired network to use this method.

2. Click the Share icon.
It is a blue folder with a plus sign.

3. Check the box next to “File Sharing”.
You will see this option in the list of services in the left panel. This will turn on file sharing.
Make a note of the IP address you see under “File Sharing: On”, which looks like this: smb://17.212.167.33. This address will be used when connecting from a Windows computer.
Click the Options button. This will open the settings for sharing with Windows. [7]
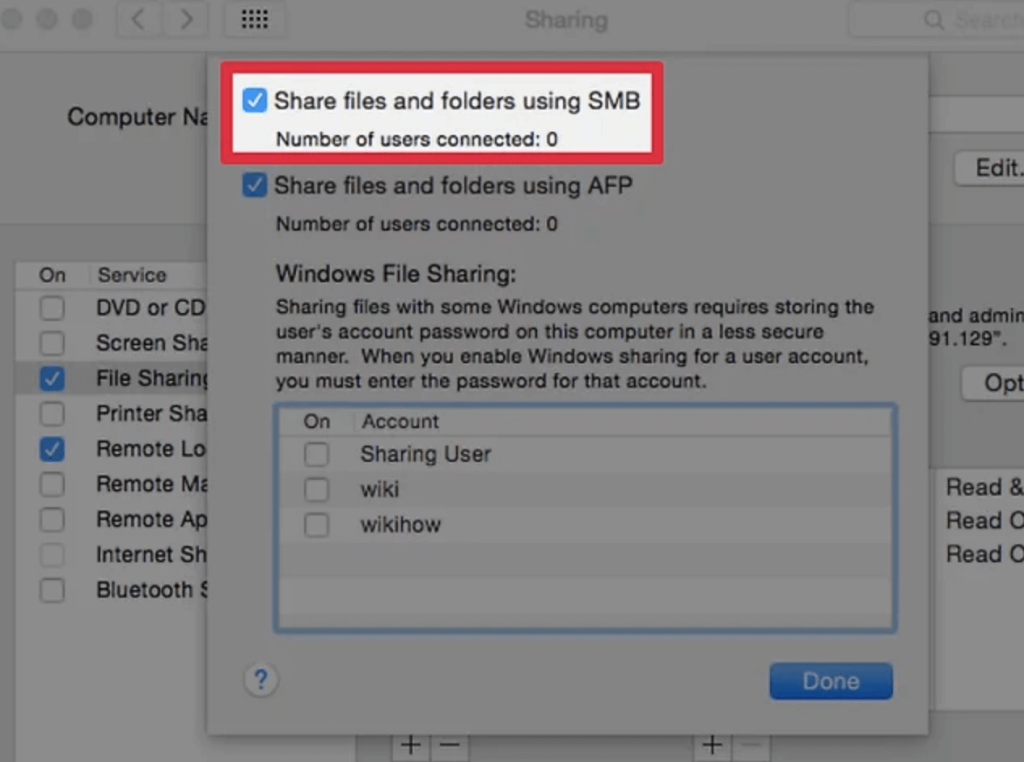
1. Check the box next to “Use SMB to share files and folders”.
Now you can select an account on your Mac computer that you can share with Windows users.

2 . Select the account and click Done. You must enter a password to confirm.

3. Add the folders you want to share.
To do this, you simply click the + in the right panel under Shared Folders, find the folder and select it, then click Add.
Repeat these steps for all other folders you want to share.

4. Select who can access the shared content.
Select the folder you want to share, and then select an account to share with in the “Users” section. You can also click + to share the content to an account that is not listed here.
If you want to share with a Windows user who doesn’t already have an account on this Mac, you’ll have to create an account for that user and select the account created here.
You can select Everyone to give anyone connected to the network access to these files, or you can select a user group to give everyone in the group access to these files.

5. Select the permissions to assign.
Next to each user, you can choose which permissions to assign to them-for example, if you want users to get full access to a folder when they log in from a desktop or laptop, then assign all permissions (read and write).
The folder or file is then now shared.

6. Allow connections from Windows computers.
You’ll need to make changes in the Network settings to allow Windows desktops or laptops to connect to your Mac computer.
Open the View menu and select Network.
Select the current connection and click Advanced….
Click on the WINS tab.
Enter the name of the workgroup on your Windows computer. If you don’t know the name, then go to Control Panel on your Windows computer, click System, and then click Workgroup. The default name is usually WORKGROUP.
Click OK, and then click Apply.

7. Access the Mac computer from the Windows computer.
Now that the files are shared on your Mac, you can access them from Windows File Explorer. Here is how to do it:
Open File Explorer on your computer – it is a folder icon in the taskbar or Windows menu. [8]
Click Network in the left panel. If network sharing is not already enabled, you will be prompted to enable it now.
Double-click the Mac and enter your login information. You are now ready to use the files.